Would you like a searchbox (searchbar) on your e-shop/website from WEBNODE?
Are you looking for a simple and stylish search box that you can put on your website or e-shop in Webnode?
Video-tutorial
Videotutorial is only in Slovak language.
In tutorial How to add a custom search box to the web? – Google Custom Search i have shown a simple searchbox from Google.
In this tutorial i will show you external searchbox SearchIQ, which will automatically load all the pages of your website / e-shop
and then provide you with the HTML code of the searchbox, which you can simply insert into your website or e-shop.
If you do not have more than 2000 pages on your website or e-shop (eg product pages or other pages of the website), then you do not have to pay anything for this app SearchIQ.
IT’S FREE.
In the FREE variant, support is also available through the forum.
SearchIQ also offers free search term statistics, which you can check directly online in their user interface.
SearchIQ is suitable as a product search engine in an e-shop or a search engine for a classic website or blog.
I am using the SearchIQ search engine on my Wpromotions.eu website. If you want to try it, please use the search engine on this website.
Lets divide this tutorial in 3 parts:
The first part – registration & getting codes
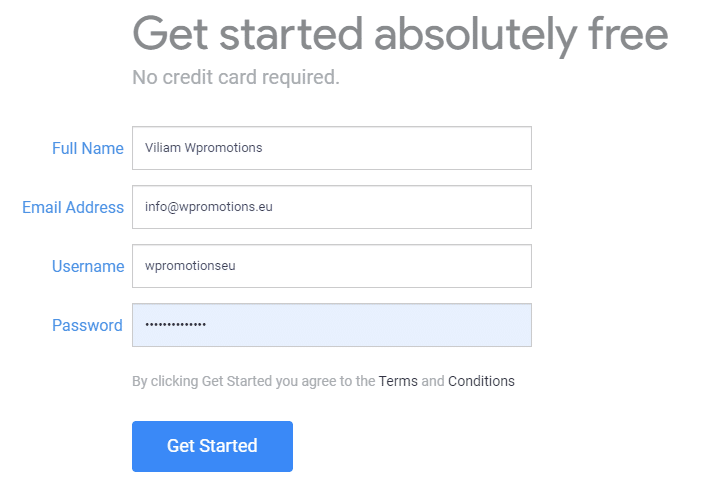
- The first step is to register with the external SearchIQ service. You can register on the official website: https://www.searchiq.co/
Start by clicking the “Get Started” button.
3. Verify your email address by clicking on the link they sent you.
If the email doesn’t coming – take a look at SPAM or Advertising.
After verifying your email, sign in.

The second part – embedding codes on your website or e-shop
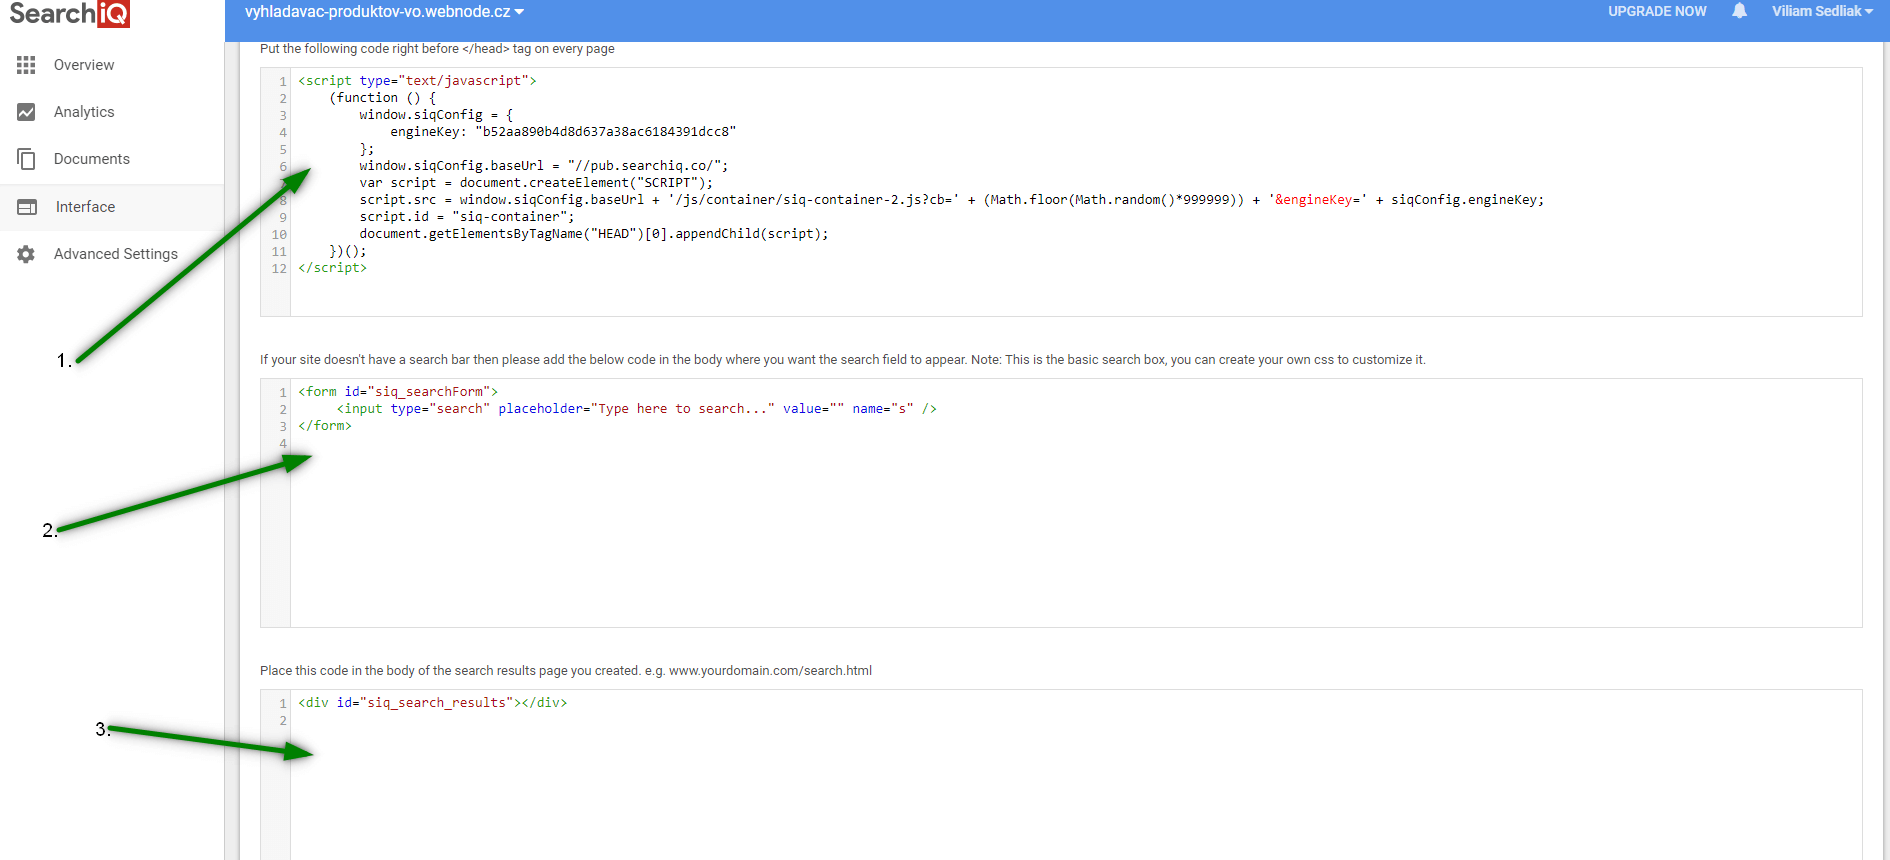
Paste the first code provided by the application into the HTML Header section on all pages of your website.
Choose how to embed the first code – depending on which Premium Plan you use in WEBNODE.
1. I have purchased STANDARD or PROFI Premium Plan
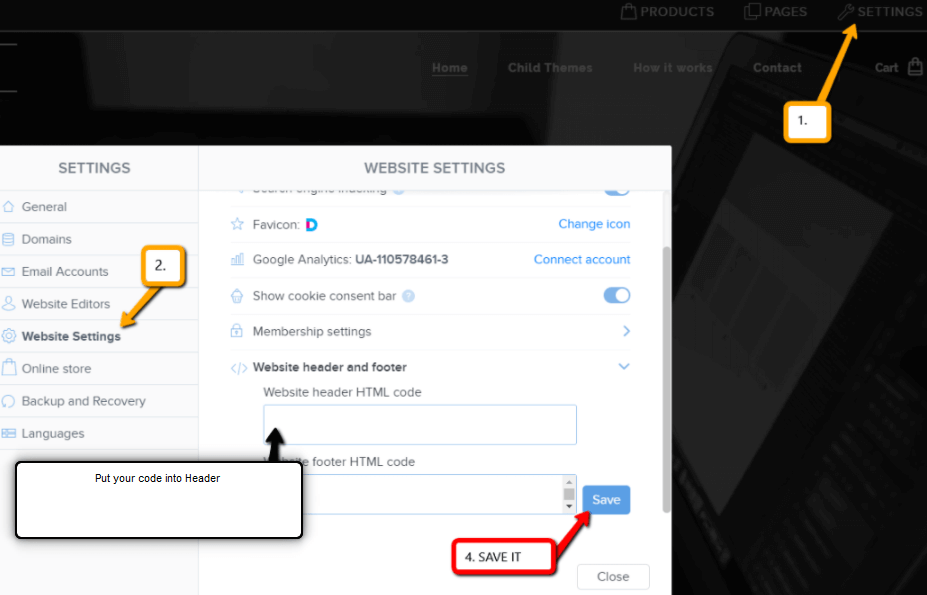
If you have purchased Standard or Profi Premium Plan from Webnode, you can paste the 1st code into the <head> header on all pages of the website with one click.
At the top of the Webnode editor, click “Settings” – “Website Settings” – “HTML Header / Footer” – “HTML Header“.
Great, you successfully inserted the first SearchIQ code in ALL pages.
2. I have a website in Free version or I have purchased the Premium Plan Limited or Mini.
If you have a website or e-shop created in the Free version or you have purchased the Limited or Mini Premium Plan, then you must insert the first code in the header on each page separately
1. Paste the code into the header of each page: In the top bar of the editor, click on “Pages” – “Select a page” – “SEO page settings” – “HTML Header” and paste the first code from SearchIQ.

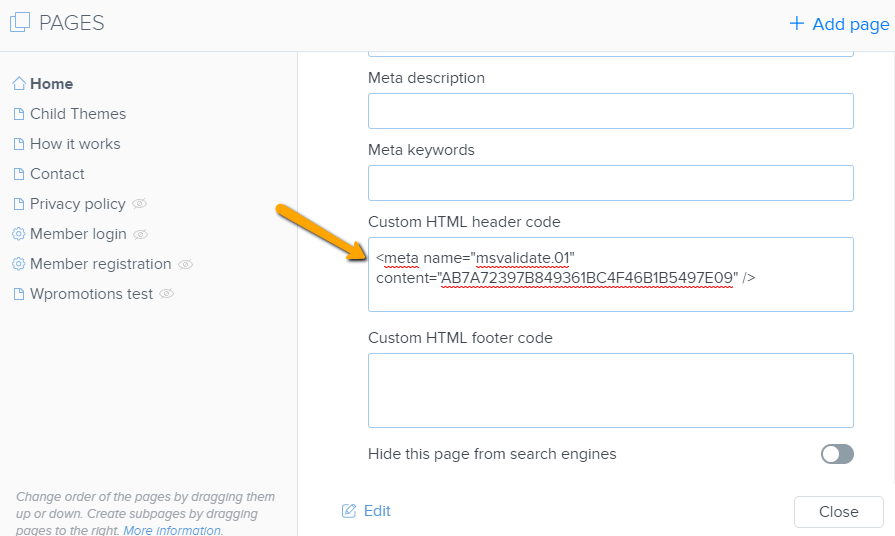
Great – you successfully pasted the first SearchIQ code.
The second code must be pasted where you want the web search box to appear.
TIP: In the second code, you can edit the text that will appear in the search engine.
Change the predefined “Type here to search…” in the code to your own like “Search” etc.
Copy the second SearchIQ code and paste it into the body of the website using the “+” and “HTML” button.
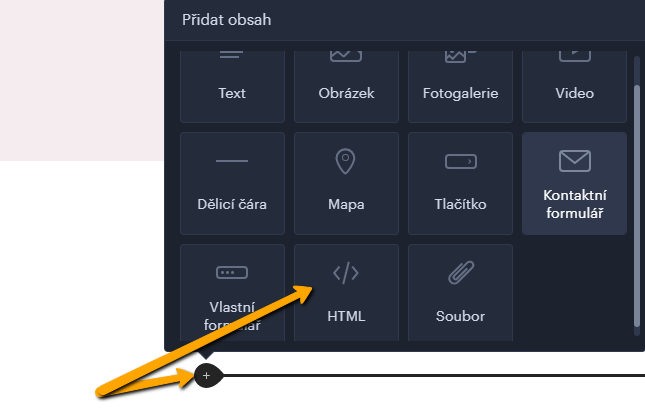
Publish it!

You should now see a small search box in the published version of your website.

Paste the third code SearchIQ on a separate page, e.g. Search results.
Create a new page in the “Pages” section, which you can name e.g. Search results.
This page will be for user search results, so when someone will use the searchbox and hit enter, automatically will be redirected to this “search results” page.

Open the page you created and paste the third code using the “+” and “HTML” button.
Paste the code where you want the search results to appear.

Publish it!

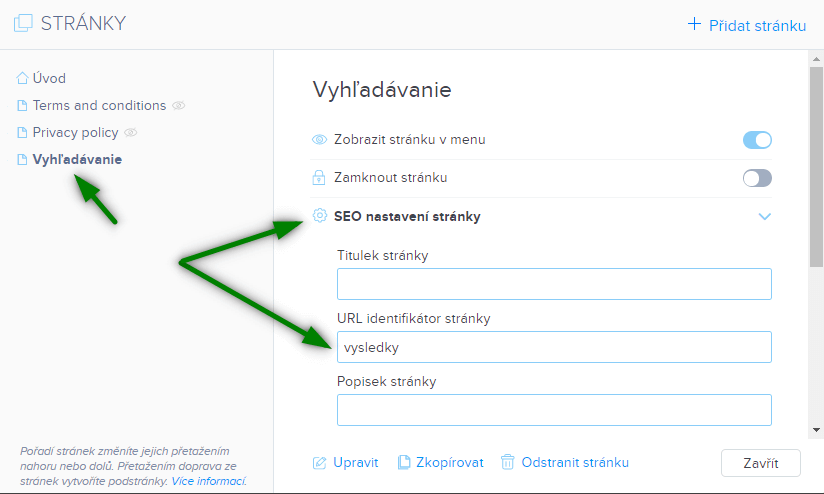
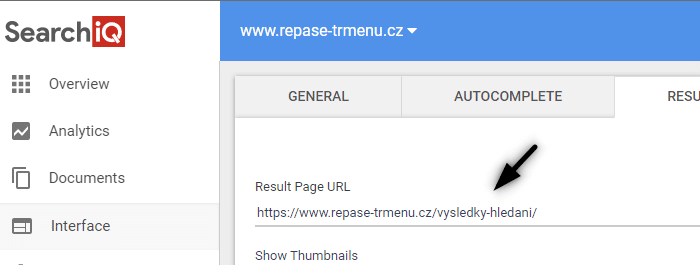
Find the URL of your page “search results” that you created.
In the Webnode editor, click on “Pages” – “Choose a results page” – “SEO page settings” and copy URL of your search results page.
Great – you have the SearchIQ search engine set up correctly in the basic small look.
The last step is now to customize the look and enlarging SearchIQ searchbox with a little bit of CSS magic.
The third part – customizing the look
SearchIQ allows you to customize the look of the search box by adding your own CSS code.
In order for the search box to look exactly as it looks on my DEMO website, you need to add your own CSS code to SearchIQ.
Subscribe to Wiliam Promotions News and get a ready-made CSS code that will customize the look of your SearchIQ search engine.
DONE – Great, you have successfully completed the last step and your search box is displayed in a new coat 🙂
You will see the change in the appearance of the search engine immediately in the published version of your website.
I hope that everything went smoothly without any problems.
If you struggle with this do not hesitate to create a new ticket in my Free Webnode Support Center.
Please write to me in the comments your feedback 🙂
More awesome tutorials
How to add a poll in Webnode?
Do you want to add a poll on a Webnode website?The free online questionnaire (web survey/poll) is one of the most common ways to get feedback from your website visitors. Without feedback, it is difficult to say whether you are acting correctly on your customers and...
How to Add GIF Images in Webnode?
Would you like to embed a GIF image on a Webnode site? Webnode editor does not allow .gif format when you embed them as an image. For this reason, you must first upload the desired .GIF image to an external service to get the image URL. Paste the URL into the code and...
How to Set up Email Marketing in Webnode via MailChimp?
Are u looking for a simple email marketing solution in Webnode? Do you want to put a pop-up on your website to collect emails from your visitors? Send news to your customers through the automated MailChimp system. It's free for up to 2,000 subscribers and 12,000...
How to connect Facebook Messenger (FB online chat for free) with Webnode?
Do you want to link Facebook messenger to a Webnode website and get online chat for free? Simple tutorial - Webnode with Facebook Messenger Facebook Messenger is a great choice for communicating with your website visitors. You can connect FB messenger with Webnode...
How to set up a Gmail mail client with Webnode email?
Do you want to connect your email with Webnode with Gmail.com and set up Gmail as a mail client? Send&Receive messages from Webnode to Gmail. In tutorial How To Create A Professional Email Signature? Simply and FREE i show you very nice way how to...
How to record activity of visitors on your website with SmartLook?
Do you want to understand your client's behavior on your website? SmartLook will definitely help you. What is "Smartlook"? Smartlook is an online application for recording the mouse movement of visitors on your website or eshop, helping you to discover...
How to create your own map? (pins on the map)?
Do you want to add a map with your own points in Webnode? Create free own map with Google My Maps. In How To Set Up Google Map Properly in Webnode? I showed you how to insert a map from a classic Google My Maps service. In this tutorial, I will show you...
How to add an online reservation system to Webnode? It’s Free!
Do you need an powerful online booking reservation system? Works perfectly with Webnode.Whatever you do, Reservio is a great choice for organizing your time! 🙂 And what does the Reservio online booking system offer to you? a clear calendar where you can find...
How to connect own domain or subdomain with Webnode? Set DNS records easily
Do you want to change the URL of the "webnode" website to your own domain f.e "mydomain.com" or "e-shop.mydomain.com" ? Using your own domain is a feature included in the Premium plans: Limited, Mini, Standard, and Profi. After purchasing one of the Premium...


